Summer Stone Fruit

Arguably the best part of the hot Summer months is the weekly trip to our local Farmer’s Market. Seeing familiar faces, interacting with growers, and picking up produce that was picked that morning, makes 90 degree weather almost bearable.

With such high temps this year, I’ve noticed that we are seeing a lot of fruits reach the market earlier than expected and in fantastic form. Last weekend, I had my eye on a basket full of stone fruit that I didn’t expect to even be edible before August! Much to my surprise, these beauties were plump, juicy and ripe for the picking.

Farmer's Market Stone Fruit

There were peaches, plums, nectarines, apricots and my personal favorite, pluots. If you’ve never had the opportunity to eat a ripe pluot, you are missing out on a delicious hybrid fruit. A cross between an apricot and a plum, a pluot carries the best traits of each fruit and presents itself with just the right amount of tart and tang, but irresistibly sweet flesh.

I find that when you stumble upon truly fresh fruit, it should be left unadulterated. So this recipe keeps the fruit at the forefront and keeps your prep time at a minimum. Feel free to omit the mint syrup, it just adds an extra dimension to the dish. If you have fragrant fruit, they can stand alone on your table!

Peach Salad

Summer Peach Salad

Yield: 6 servings

Ingredients:
6-8 full size stone fruits (peaches, nectarines, plums, apricots, pluots, etc.)
1/4 c. boiling water
1 T. honey
1 bunch fresh mint

Method:
1. Fire up your grill to high heat. Be sure to clean the grates from any leftover grilling and oil the grates. You can also use a stove top grill pan or a non-stick skillet (you just won’t get those beautiful grill lines!).
2. Prep your fruit by slicing into thick wedges and removing the pits.
3. Grill each side of the fruit just long enough for grill marks to form, then set aside in a large bowl.
4. Combine your boiling water and honey, then stir to dissolve the honey completely.
5. Add the bunch of mint to the hot water and allow to steep for 5 minutes, or just long enough to release it’s flavor.
6. Remove the mint from the syrup and allow it to cool slightly.
7. Drizzle the mint syrup over the fruit and toss to coat.
8. Serve in a large bowl and garnish with mint sprigs (if desired).

Notes:
1. The fruit in this recipe doesn’t even have to be grilled – if you are short on time, make the syrup ahead and store in the refrigerator. When you have some ripe fruit on hand, just slice it, toss with the cold syrup, and serve.
2. I am not a fan of leftovers, but these make a great yogurt topping the next day. Store some in the refrigerator, combine with some Paleo granola, and top your favorite yogurt.

Paleo Tomato Soup

Tomato Soup
This simple recipe for delicious Paleo Tomato Soup should be a staple in your collection. It utilizes canned tomatoes (which can really help stretch your budget) and a few other simple ingredients to produce a crowd-pleasing dish.

Feel free to adjust the seasonings to your personal preferences – including the varietals of olive oils, tomatoes and wine. I love San Marzano tomatoes, which can be found at most grocery stores. There may be some citric acid in the ingredient list (as a preservative), but that should be all you see. Be sure not to pick up a can that has sugar, herbs, or additional salt added. When you choose an olive oil, get a high quality brand that has a robust flavor – it will come through in the final product. Also, I like to use pinot noir for the wine in this recipe. It stands out against the acidity of the tomatoes and provides a great foundation.

Yield: about 7 cups
Ingredients: 
3 T. olive oil
1 medium onion, minced
2 T. minced garlic
2 T. tomato paste
12 oz. red wine
2 – 28 oz. cans whole, peeled tomatoes
1 small bunch basil, chopped
1 t. paprika
Salt & Pepper, to taste

Method:
1. Heat the olive oil in a dutch oven over medium-high heat.
2. Add the onion and sauté with a wooden spoon until softened, about 4 minutes.
3. Add the garlic and tomato paste. Cook, stirring continuously, until you smell roasting garlic and the tomato paste has cooked down, about 2 minutes.
4. Add the red wine and reduce until it is a syrupy consistency, about 5 minutes.
5. Add both cans of tomatoes, the chopped basil, and paprika to the pot. Stir to combine.
6. At this point, you can use a potato masher to break up the tomatoes, or just use the end of your wooden spoon.
7. Continue cooking until the tomatoes are heated through, about 15 minutes.
8. Add salt and pepper to taste.
9. Remove from the heat and transfer to a blender. Blend until smooth.
10. Check again for seasoning and store in an airtight container for up to a week.

Tips:
1. You’ll probably need more salt than you think. It really brings out the nuances of the tomatoes, so don’t be afraid to keep adding it. For this recipe, I generally use at least 1 T, if not more, depending on the quality of the tomatoes.
2. If the soup is thicker than you’d like, thin it out with some chicken or vegetable stock. It will adjust the consistency without sacrificing flavor.
3. Always taste the dish before you store it. If you thin it out, it will need more seasoning.
4. This soup freezes really well. Portion it into FoodSaver bags, seal, and lay flat in your freezer. It will keep for up to 6 months.

Paleo Stuffed Tomatoes

Stuffed Tomatoes
My husband recently met with a nutritionist to discuss a wide range of challenges he’s been having with regard to nutrition – everything from sleep issues, to acid levels, all the way to actual nutrient intake. When we started our Paleo journey, it was clear that we were severely nutrient deficient in a number of areas, but we’ve made a great deal of improvement in the last year. That improvement has given us the opportunity to look even closer at the way our bodies process the foods we eat and what we can do differently to lead happier, healthier lives.

Victoria Ritchie, NTP, had some great insights for him, including discussing his acidity level and need to increase potassium and salt in his diet. One of the best ways to do this was through avocados. He was stoked to hear that, considering it may be his all-time favorite food.

We are always trying to find ways to eat more avocados, or even better, guacamole. These little stuffed tomatoes can really be filled with anything – I just love a reason to eat more guac. It’s best to try these during tomato season (that would be in the summer for most people), but cherry tomatoes are available in supermarkets year-round. Just be aware that they’ve probably been in cold storage and won’t be as delicious as their sunshine-filled friends in July.

Cut Tomatoes
It’s pretty easy to core the tomatoes, just make sure you have a sharp paring knife. Also, to ensure they don’t roll around on your serving plate, slice a small flat spot on the bottom of each to give the tomato a solid foundation on which to sit.

Yield: about 30 half-tomatoes
Ingredients:
1 pint container cherry tomatoes, ripe
1/2 cup Paleo guacamole
1 slice cooked bacon, crispy

Method:
1. Slice each tomato in half around its equator (the fattest part). Slice off a small amount on what will be the bottom side of each half, allowing it to sit flatly on a plate without rolling around.
2. Remove the seeds and extra flesh from the middle of each tomato half, discarding what you remove.
3. Fill each tomato half with about a teaspoon of guacamole. Depending on the size of your tomatoes, the amount will vary.
4. Break up the crispy, cooked bacon into small pieces to use for garnish. Top each mound of guacamole with a piece of bacon.
5. Store under refrigeration and serve immediately. The guacamole will start to brown after a couple of hours of exposure to oxygen.

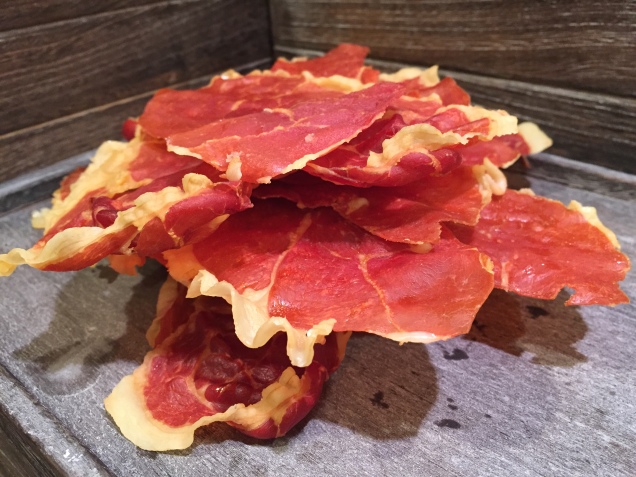
Prosciutto Crisps

Prosciutto Crisps
The ultimate in simple to create, easy to devour snacks are these prosciutto crisps. It’s as easy as opening a package, heating up the oven, and throwing them in. They are a fantastic vehicle for our guacamole or they can be inhaled on their own. To be honest, it’s better than bacon. That’s saying a lot.

You can buy pre-sliced prosciutto in the deli or cheese section of your supermarket. At Whole Foods, I love to get the Applegate Farms Natural Prosciutto. It only has three ingredients: pork, salt, and spices. It tastes great and is reasonably priced. It’s the perfect thickness for this application and each slice is separated by a piece of coated paper, so they are easy to separate. You don’t realize how important this little piece of paper is until you try to gently divide two paper-thin slices of prosciutto – it’s impossible. So if you don’t get the Applegate Farms brand, be sure that whatever you buy, each slice has some sort of divider between.

Yield: 16 crisps
Ingredients:
16 thin slices prosciutto

Method:
1. Preheat your oven to 375ºF. Line a few sheet pans with parchment paper.
2. Lay each piece of prosciutto out on the parchment-lined sheet pan, be sure not to overlap.
3. Bake until crispy, about 15 minutes. Depending on the strength of your oven, it may take more or less time. Start checking them after 12 minutes. The edges will curl a bit and they will look crispy.
4. Allow to cool completely and store in an airtight container.

Asiago Rosemary Crisps

Asiago Crisps

I seem to be posting a stream of single-digit ingredient recipes. Why can’t everything be this easy? Today, we’ve got a two-ingredient chip that is crispy, savory and delicious – all in one. You can make cheese crisps with nearly any hard cheese and a variety of herbs. If you don’t have any fresh herbs, you can use dried, just use about a quarter of the amount.

Additionally, these don’t have to be made in muffin tins. If you want a more abstract shape, or you want something larger, just bake them on a silpat mat or parchment paper. I like using muffin tins because I like the uniformity of the result.

When they start to brown, they are probably done. Initially, they won’t look “crispy”, but give them a few minutes to cool and you’ll find that they are pretty easy to remove from the muffin tin with an off-set spatula. If they aren’t crispy enough, just throw them back in the oven and finish crisping.

Yield: 24 crisps
Ingredients
4 oz. Asiago cheese
2 T. chopped fresh rosemary

Method
1. Preheat your oven to 350ºF.
2. Shred the cheese on the small holes of a box grater. You can also do this in a food processor. Just make sure to shred it on the smallest setting.
3. Combine the cheese and rosemary in a small bowl. Toss to combine.
4. Divide the cheese evenly into the wells of 24 standard muffin tins. It ends up being about 2 t. per well.
5. Bake until they begin to brown, about 15 minutes.
6. Remove from the oven and allow to cool completely. Store in an airtight container.

Tip: A few great cheese and herb combinations…
Sage + Cheddar
Tarragon + Gruyere
Pink Peppercorn + Thyme + Parmesan
Dill + Romano

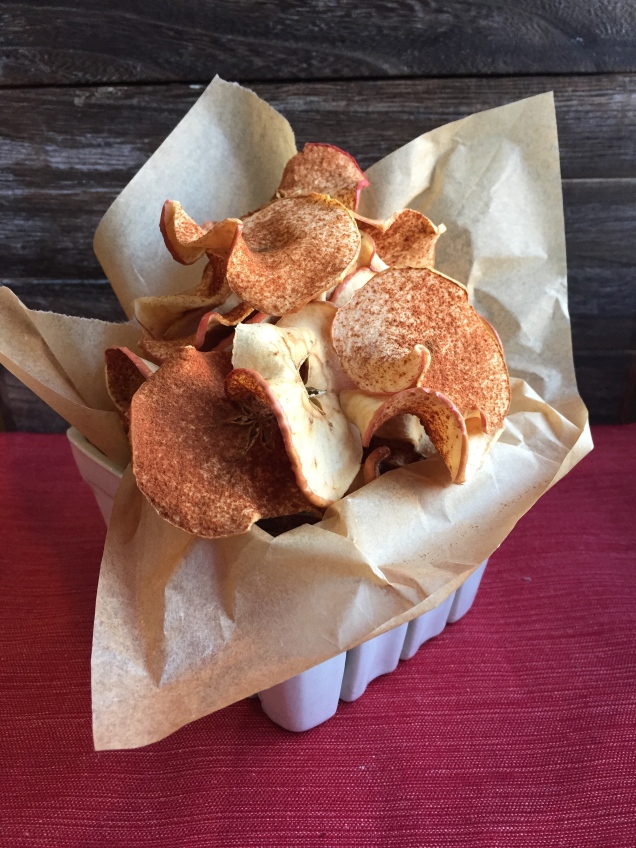
Paleo Cinnamon Apple Chips

Cinnamon Apple Crisps
Want a nearly hands-off, two ingredient, delicious snack? Cinnamon apple chips are the perfect answer to the need for easy to create, healthy snacks that require little effort. If you own a dehydrator, this will be even less time-consuming. Since most people only have an oven, this recipe is designed with that in mind. They do need to “dehydrate” for a few hours, so throw them in the oven on a day you know you’ll be home for a while, and let them do their thing.

Yield: about 50 chips
Ingredients
3 large, sweet apples (I like Pink Lady or Honeycrisp)
Cinnamon

Method
1. Preheat the oven to 200ºF. Line two sheet pans with parchment.
2. Wash your apples thoroughly. Slice them thinly on a mandolin or with a knife (I like around 1/16 of an inch).
3. Lay the apples on the prepared sheet pans in a single layer, being sure not to overlap.
4. Sprinkle them with as much cinnamon as you’d like. I’m a cinnaholic, so I go to town. You don’t have to be as generous.
5. Put them in the oven to dehydrate. Flip them half-way through.
6. When they are completely dry, allow to cool and store in a zip-top bag.

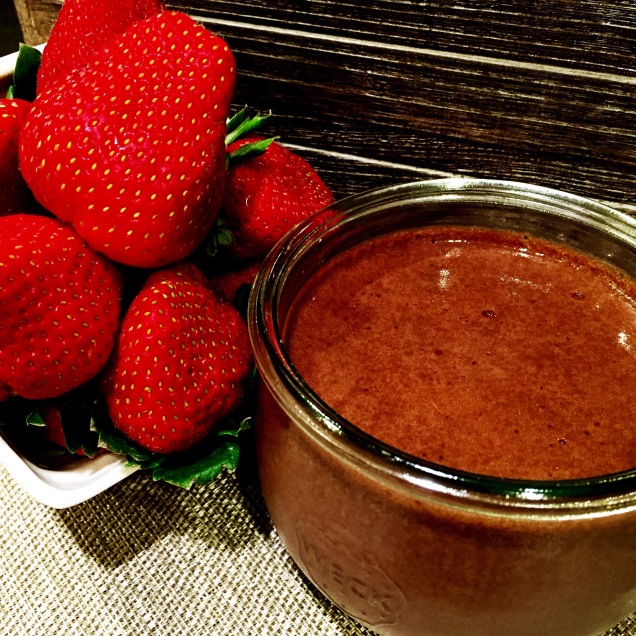
Paleo Chocolate Coconut Creme

Chocolate Coconut Creme

A piece of fruit is a great option for a sweet Paleo snack, but sometimes a cup of berries just isn’t going to cut it. Add a bowl of chocolate into the mix and we’re moving in the right direction. This Paleo take on classic chocolate fondue hits the spot and satisfies those annoying sweet cravings. It’s foundation is coconut milk, so it’s dairy-free and sweetened with honey. Kids love it and they can choose a variety of dippers – strawberries, bananas, or even Paleo chocolate chip cookies (a revelation stumbled upon by my husband).

If you want to make a batch for a party, you can reserve half of the cooked creme and omit the cocoa powder for a strictly vanilla coconut version. A duo of dips always seems more complicated, but it’s really just a matter of leaving out an ingredient!

Yield: 16 oz.
Ingredients
2 cans coconut milk (14 oz. each)
1/2 c. honey
1 oz. cocoa powder
2 T. vanilla

Method
1. Combine coconut milk and honey in a medium sized heavy-bottom saucepan.
2. Bring to a full boil, then reduce heat to low.
3. Stirring occasionally, cook 40-60 minutes, or until it has reduced by nearly half and is the consistency of thick cream.
4. Whisk in cocoa and vanilla, stirring to combine.
5. Taste and add honey if it isn’t to your desired sweetness.